The Ultimate Guide to Building a 3D Printed F1 RC Car: Engineering Excellence at Your Fingertips
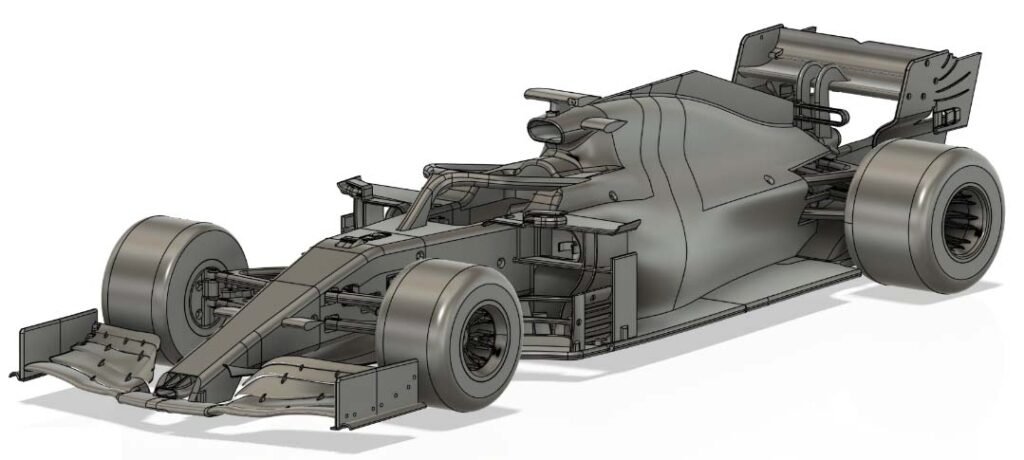
The OpenRC F1 project—spearheaded by Swedish designer Daniel Norée—is more than a hobby; it’s a masterclass in precision engineering, aerodynamic design, and accessible innovation. Unlike generic RC models, a Formula 1 car embodies peak automotive science: downforce-generating wings, weight-optimized chassis, and suspension tuned for high-speed stability.
Through this website, you can have a comprehensive understanding of F1 RC Car.
By 3D printing an F1 racer, you:
- Decode F1 engineering principles: Learn how real-world teams like McLaren and Red Bull use 3D printing for wind tunnel parts, lightweight components, and rapid prototyping.
- Achieve unmatched customization: Swap wings, modify diffusers, or scale the chassis—all impossible with off-the-shelf RC cars.
- Bridge digital and physical craftsmanship: From CAD file to racetrack, this project transforms theoretical knowledge into tactile skill.
For educators and makers, it’s a multidisciplinary toolkit merging physics, electronics, and additive manufacturing.
F1 RC Car Technical Specifications
Design based on the OpenRC 1:10 scale model, optimized for 3D printing and performance.
| Parameter | Specification | Real-World F1 Correlation |
|---|---|---|
| Scale | 1:10 (Length: ~50cm / 19.7″) | Mirrors actual F1 car proportions |
| Weight | 1.0–1.5 kg (2.2–3.3 lbs) | Lightweight focus akin to carbon fiber F1 |
| Top Speed | 30–40+ mph (motor-dependent) | Simulates high-speed cornering dynamics |
| Motor Compatibility | 540-size brushed/brushless (2000–3000KV) | Matches hobby-grade RC performance needs |
| Battery | 2S–3S LiPo (7.4V–11.1V) | Balances runtime and power density |
| Chassis Material | NylonX, PETG, or ABS | Prioritizes impact resistance and stiffness |
| Tire Material | NinjaFlex or TPU | Provides grip and flex for traction |
The 1:10 scale dominates hobbyist builds due to part availability, battery compatibility, and realistic handling—making it the ideal balance between detail and practicality.
3D Printed F1 RC Car Project Checklist: Tools, Materials, and Costs
Building a functional 3D printed F1 car requires strategic material choices and electronics. Budget estimates assume mid-tier components.
1. 3D Printing Supplies
Filaments:
- Structural parts (chassis, gears): NylonX or ABS ($35–$50/kg) for strength and heat resistance.
- Aesthetic parts (body, wings): PLA or PETG ($20–$30/kg) for ease of printing and smooth finishes.
- Tires: Flexible TPU/NinjaFlex ($40–$50/kg) for grip.
Print Settings:
- Layer height: 0.2mm for strength, 0.1mm for detailed wings.
- Infill: 30% (chassis), 80% (gears, axles).
- Wall thickness: 1.2mm (3 walls minimum).
2. Electronics & Hardware
| Component | Example | Cost |
|---|---|---|
| Brushed Motor | 540 12T (e.g., Traxxas Titan) | $20 |
| Brushless Upgrade | 3000KV Sensorless (e.g., Hobbywing) | $60 |
| ESC | 60A Waterproof (e.g., Hobbywing QuicRun) | $40 |
| Servo | 10kg-cm Torque (e.g., PowerHD) | $25 |
| Transmitter/Receiver | 2.4GHz 2-channel (e.g., Flysky GT3B) | $45 |
| Battery | 7.4V 5000mAh LiPo | $30 |
| Bearings | 8x12x3.5mm & 12x18x4mm (x10) | $15 |
| Screws/Nuts | M3x8–M3x12 (Stainless Steel) | $10 |
3. Tools
- Essential: 3D printer (e.g., Creality Ender 3 V3), flush cutters, hex drivers, soldering iron.
- Optional but recommended: Digital calipers, needle files, CA glue for reinforcing joints.
Total Estimated Cost:
- Budget Build: $170 (PLA chassis, brushed motor)
- Performance Build: $350+ (NylonX chassis, brushless motor, high-torque servo)
Step-by-Step Build Guide: From Print to Pit Lane
Step 1: Print Strategically
- File Source: Download the OpenRC F1 model pack from Thingiverse.
- Orientation Matters:
Print chassis plates flat for maximum layer adhesion.
Vertically orient gear components to minimize support marks on teeth.
Step 2: Assemble the Drivetrain
- Rear Axle: Press-fit bearings into axle holders, secure with M3 screws. Align spur gear with motor pinion (0.5mm gap).
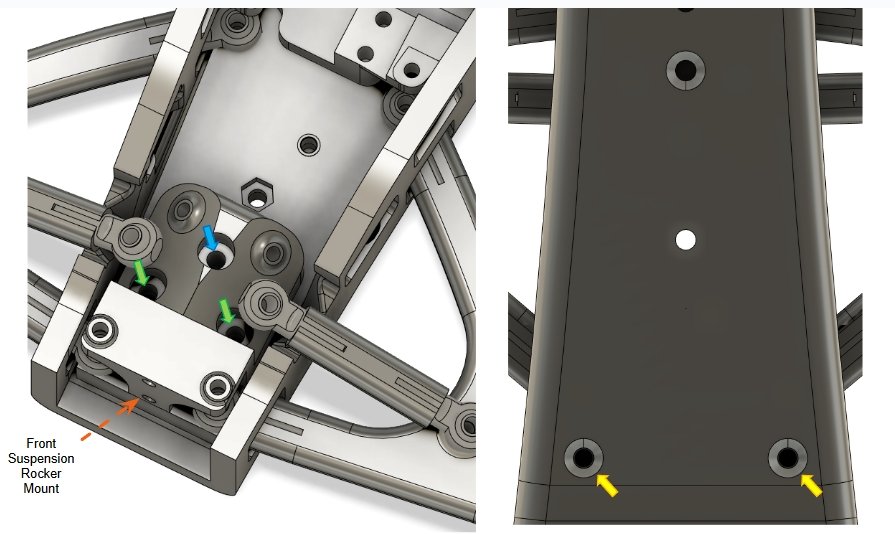
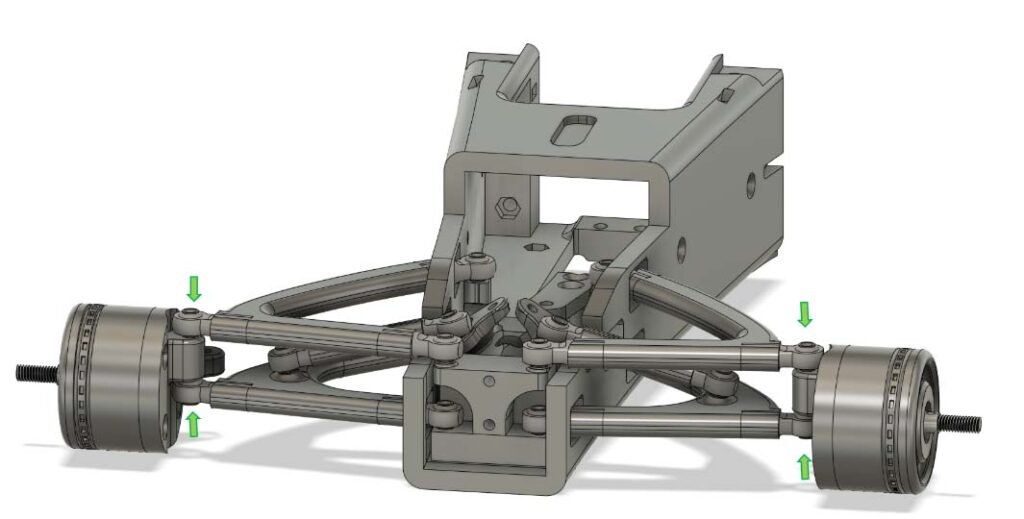
- Front Suspension: Attach wheel hubs to steering blocks. Use shims to eliminate play in kingpins.
Step 3: Integrate Steering & Electronics
- Servo Saver: Connect the servo horn to the steering pushrods. Test turning radius before tightening screws.
- Electronics Layout:
Mount the ESC near the motor for short power leads.
Secure the receiver with foam tape to reduce vibration interference.
Step 4: Install Body & Fine-Tune
- Aerodynamic Components: Attach the rear wing and diffuser using M3x12mm screws. Ensure the front nose cone clears steering components.
- Weight Distribution: Position the battery low and centered to reduce roll in corners.
- Final Checks:
Bind transmitter/receiver.
Calibrate ESC throttle range.
Test suspension travel on uneven surfaces.
Pro Tips for Peak Performance:
- Material Hacks: Anneal PLA parts at 60°C for 30 minutes to boost heat resistance by 40%.
- Traction Tuning: Dip TPU tires in acetone to create a sticky, rubber-like surface.
- Racing Upgrades: Swap to oil-filled shocks (e.g., Traxxas 3652) for adjustable damping.
Building a 3D printed F1 RC car demystifies cutting-edge motorsport technology while proving that democratized manufacturing can rival commercial products. As teams like Red Bull Racing use 3D printing for 9,000+ parts annually, this project connects your workshop to the pit lanes of Silverstone.
“The OpenRC car isn’t just a model—it’s a testament to open-source innovation. My 4x-scale F1 took the concept to extremes, but the 1:10 original remains the perfect balance of speed and sanity.”
—Joel Telling, 3D Printing Nerd
Ready to start? Download files, print your first chassis plate, and join the OpenRC Buildmap community. The grid awaits.
Resources: